This article guides you through the creation of your very own Fanatics storefront so that you can start promoting our products to your audience.
From the top navigation menu, select My Storefront.
From your profile tile, select
![[Edit]](https://paligoapp-cdn-eu1.s3.eu-west-1.amazonaws.com/impact/attachments/f01cdffa431a4d75ff09c130b66974d4-da50d95ebe8c06272ce29577617fbd52.svg) [Edit] in the upper-right corner to edit your profile.
[Edit] in the upper-right corner to edit your profile.Fill in your Details:
Cover Image: Upload a photo that matches your storefront’s style. We recommend you use a photo that’s at least 1600px wide and 400px tall. You can crop and resize your chosen picture by using the sliding tool.
Profile picture: Your dashboard profile picture is used as your storefront avatar by default, but you can change it at any time by either selecting one from your social channels or uploading a picture that best represents you. We recommend you use a photo that’s 1024px by 1024px. You can crop and resize your chosen picture by using the sliding tool.
Page name: This is the name that’ll appear in your public storefront URL. You can change your storefront name once per month.
About: Let your followers know who you are and what you’re passionate about (250-character limit).
On the right,
![[Toggle on]](https://paligoapp-cdn-eu1.s3.eu-west-1.amazonaws.com/impact/attachments/f01cdffa431a4d75ff09c130b66974d4-84d1224fd3bb6ba94b899febe2021eaa.svg) [Toggle on] your connected social channels to display them on your storefront.
[Toggle on] your connected social channels to display them on your storefront.Optionally, select
![[List View]](https://paligoapp-cdn-eu1.s3.eu-west-1.amazonaws.com/impact/attachments/f01cdffa431a4d75ff09c130b66974d4-8fa064211f365ee173a0637b494651c9.svg) [Rearrange] and drag your social channels to change their display order.
[Rearrange] and drag your social channels to change their display order.Optionally, select
![[Add]](https://paligoapp-cdn-eu1.s3.eu-west-1.amazonaws.com/impact/attachments/f01cdffa431a4d75ff09c130b66974d4-1eb87a593a1ac0d9c10f6162b1175f95.svg) Add Account to link a new social account to your storefront.
Add Account to link a new social account to your storefront.
Once you're done adding your intro, select Save in the upper-right corner.

Once your storefront has been created, it’s time to start building collections and adding shoppable posts.
Collections make it easy to find your recommended products in one place. After creating a collection, make sure to add it to your storefront—unless it was created directly from your storefront. The steps below walk you through the process.
You can create them from 4 areas: your collections page, the Find Products page, your Fanatics Chrome extension, and directly from your Storefront. You can also add products to your collections from any of these locations.
Select
![[Hearted]](https://paligoapp-cdn-eu1.s3.eu-west-1.amazonaws.com/impact/attachments/f01cdffa431a4d75ff09c130b66974d4-5f2ed9497b92cd6dee8946a736d78496.svg) [Heart] from the top navigation menu, then select Create new collection.
[Heart] from the top navigation menu, then select Create new collection.Fill in the following sections:
The collection cover image.
The collection name.
The collection description.
Optionally, you can add linked products to your collection straightaway. See the Add products checklist below.
Then select Create.
From the top navigation menu, select Find Products.
Use the search bar to find products by keyword.
Alternatively, in the Popular, Find Products by League, Collabs & Collections, or My Favorites sections, select a product or category that interests you.
Use the filters on the left to filter by Category, Brand, and Price to find products.
Select
[Heart] in the upper-right corner of the tile you want to add to a collection.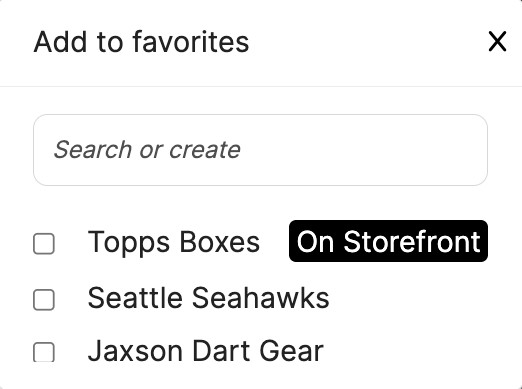
Enter the name of your new collection in the search bar, then select Create.
You can also use the search bar to find an existing collection to add the product to, then select
![[Checked box]](https://paligoapp-cdn-eu1.s3.eu-west-1.amazonaws.com/impact/attachments/f01cdffa431a4d75ff09c130b66974d4-aee23966cd91ec2a9f9985361c43ab1a.svg) [Checkbox] from the search results.
[Checkbox] from the search results.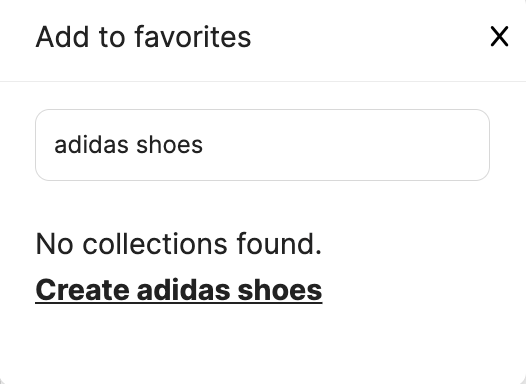
Download your brand's extension. Learn how to download your extension here.
Navigate to your brand's website, find the product you want to add to a collection, and then select your Chrome extension.
Optionally, select your social account from the
![[Drop-down menu]](https://paligoapp-cdn-eu1.s3.eu-west-1.amazonaws.com/impact/attachments/f01cdffa431a4d75ff09c130b66974d4-d6b35853a9aa1f1fe6bd66da29bd09fa.svg) [Drop-down menu].
[Drop-down menu].Select
[Heart] Add to Collection.To create a new collection, enter a name in the search bar, then select Create <collection name>
[Add].Optionally, you can select
![[Unchecked box]](https://paligoapp-cdn-eu1.s3.eu-west-1.amazonaws.com/impact/attachments/f01cdffa431a4d75ff09c130b66974d4-396370c2cdec89ba7d714c4c58e6845b.svg) [Unchecked box] Add collection to my storefront to add the collection to your storefront.
[Unchecked box] Add collection to my storefront to add the collection to your storefront.
If you create a collection via your storefront, it will immediately be added.
In your storefront, navigate to My Collections.
Select Add Collection → Create New.
Alternatively, from the top of your storefront page, select
Add Collection → Create new.
Select your collections cover image, name and description.
- Optionally, [Toggle on] Campaign and select a campaign and task from the drop-down menus to link your collection directly to a specific campaign for reporting purposes.
Add linked products to your collection. See the Add products checklist below.
Select Publish in the upper-right corner to make your collection immediately available on your storefront.
Once you’ve created your collections, add them to your storefront to make them accessible to your audience.
In your storefront, navigate to My Collections.
Select Add Collection → Select Existing.
Choose from the collections you’ve already created.
Select Next.
Optionally, edit your collection’s cover image, name, description, linked campaigns and linked products.
When you’re done, select Publish.
Optionally, once your collections are available on your storefront, you can grab a link to it by selecting
![[Upload].svg](https://paligoapp-cdn-eu1.s3.eu-west-1.amazonaws.com/impact/attachments/f01cdffa431a4d75ff09c130b66974d4-b29b5d8ad29643381a652b23950fe355.svg) [Copy].
[Copy].
Once you’ve filled your storefront out with some collections, you can start creating shoppable posts to share with your followers. Add any content from your social channels or device to your storefront and include links to your favorite products.
- In your storefront, navigate to your Shoppable Posts section and select Add Post.
- Alternatively, from the top of your storefront, you can select Add post.
- Alternatively, from the top of your storefront, you can select
- From the left of the slideout, select the [Drop-down menu] of the social media network you’re interested in, select the account you want to use and choose the specific post with which you’d like to make a shoppable post.
- If you select Instagram as your social network, you can select from Posts, Reels, or Stories.
- Select Next.
- Browse and select the products you’d like to promote in your post, then select Next. See the Add products checklist above.
- Review your post and your linked products, then select Publish to share your shoppable post to your storefront.
- Optionally, you can grab a link to your shoppable post once it's published by selecting Share from your storefront.
You can upload images or videos directly from your device instead of using posts from your social media platforms.
- From the top navigation bar, select Storefronts.
- Navigate to your Shoppable Posts section and select Add Post.
- Alternatively, from the top of your storefront, you can select Add post.
- Alternatively, from the top of your storefront, you can select
- In the Add Post slideout, select Add manual post.
- Select Upload media and choose your image or video.
- Uploaded images can be cropped or resized using the sliding tool.
- Optionally, add a caption.
- Select
 [Check] to save the content and caption, then select Next.
 - Browse and select the products you'd like to promote in your post, then select Next. See the Add products checklist above.
- Review your post and your linked products, then select Publish to share your shoppable post to your storefront.
Optionally, you can grab a link to your shoppable post once it's published by selecting
Share from your storefront.Important: Your shoppable post link is not a tracking link. Use this link to share your shoppable post with your audience. To learn more about what a tracking link is, see Create Tracking Links.
Add tabs to your storefront
You can organize your storefront by using tabs. See Create & Manage Your Storefront Tabs to learn how.
Step 3: Publish your storefront
Now that you've populated your storefront with collections and shoppable posts, you’re ready to publish your page and post it to your social media platforms.
In the upper-right corner of your storefront page,
[Toggle on] Publish.Select Publish.
Select Copy link to copy the link to your storefront and post it to your social media platforms.
Optionally, select
![[Linktree logo]](https://paligoapp-cdn-eu1.s3.eu-west-1.amazonaws.com/impact/attachments/f01cdffa431a4d75ff09c130b66974d4-387a60126519069d4fbecaa8ff6bde51.svg) [Linktree] Add This to My Linktree to add your storefront to your Linktree page. Then, log in to your Linktree account and [Toggle on] your storefront.
[Linktree] Add This to My Linktree to add your storefront to your Linktree page. Then, log in to your Linktree account and [Toggle on] your storefront.
Once published, you can use the buttons at the top of the page to:
Analytics - View a snapshot of your storefront’s analytics.
Share - Copy the link to your storefront.
Preview - See your storefront exactly as your audience will.
Add This to My Linktree - Add your storefront to your Linktree page.

Congratulations! Your audience can now easily click through your storefront and make purchases based on your recommendations. Keep the momentum going by regularly updating your storefront with new products and posts.